Mini Project 5 - FOCUS (Due 3/15 Friday at 12pm)
*Project created by Paul Shao, with inspiration from Google Geolocation Demo Services
Introduction and Project Overview
Congratulations on finishing the last lesson for the Android Training Program! Now that you’re fully equipped with all the knowledge and tools to build awesome Android applications, let’s start exploring a bit more adventurously.
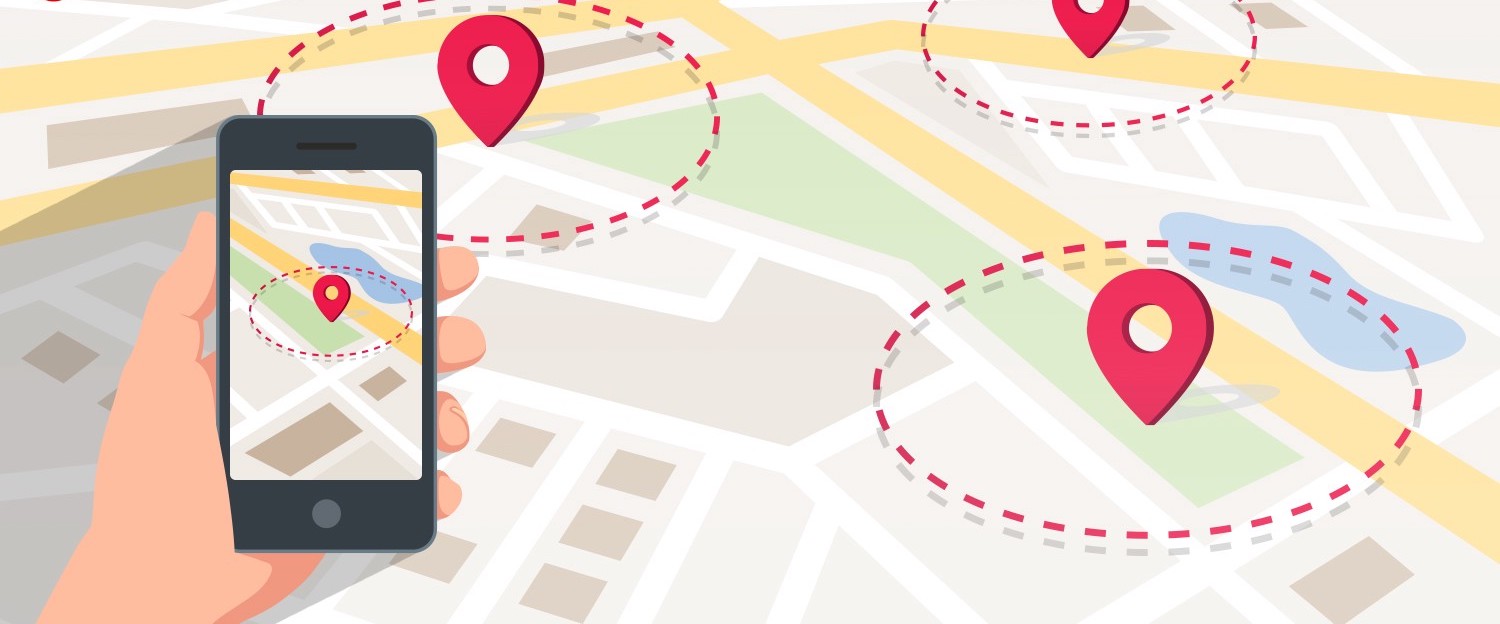
In this project, you will be creating an application that allows MDB DevCore and Contract members to 100% focus on their work. In order to achieve this, your application will implement what we call a “Quiet Hour” functionality. How it works is that when you enter into the application, it will ask you to choose a set of designated locations as FOCUS locations. Once you confirm these locations and physically enter any of them in the future, your phone will be automatically turned into silent mode, allowing you focus on getting the job done! Once you leave the location, the application will turn your device back to normal by restoring your phone to the previous ring mode and volume.
Project Structure
While daunting at first sight, I will help divide the project into different sections and provide guidance/hints along the way to help you conceptually understand how to tackle the design/implementation. Please read through the following descriptions very carefully. Pay attention to all the library references I mentioned, and makes use of any documentation/user guide links I’ve provided below.
Please also note that this project will also have one milestone checkpoint before the final deadline on Friday. The checkpoint is enforced to make sure that you are on the right track and are making solid progress toward a fully functionally and well-defined application. The checkpoint will be due this Tuesday (3/12) at 3pm. It will be worth around 10% of your overall project grade so please start on the project when you can ASAP.
Part A. Initial Design and App Flow
A good application always starts with a clearly-defined outlines, indicating what activities and roughly what components/architecture will be utilized throughout the development process.
Consider what you should have to build this application and answer the following questions in a textfile you create. Name the textfile outline.txt
Here are the questions you should be addressing:
- Based on the outline/introduction of this project, what should be the first thing I will see once I open up the application?
- How can I search for, choose a set of designated locations, and display the result on the screen as a scrollable list?
- How can I turn my phone into silent mode?
- How can I detect my current location?
- List out all the classes and briefly describe what their intended functionalities/roles are.
Once you are done with answering these questions, you should start implementing the following parts:
- The
main activitywith a search bar that allows you to search for locations by their name (think about how you did that in MP2) - The backbone/structure of a scrollable list of all the places that your query matches with.
- An
Utilsclass for handling errors your application might encounter and for turning your phone into silent mode
Here are some potentially helpful links to help you get started:
Part B. Rounding Up All the Places
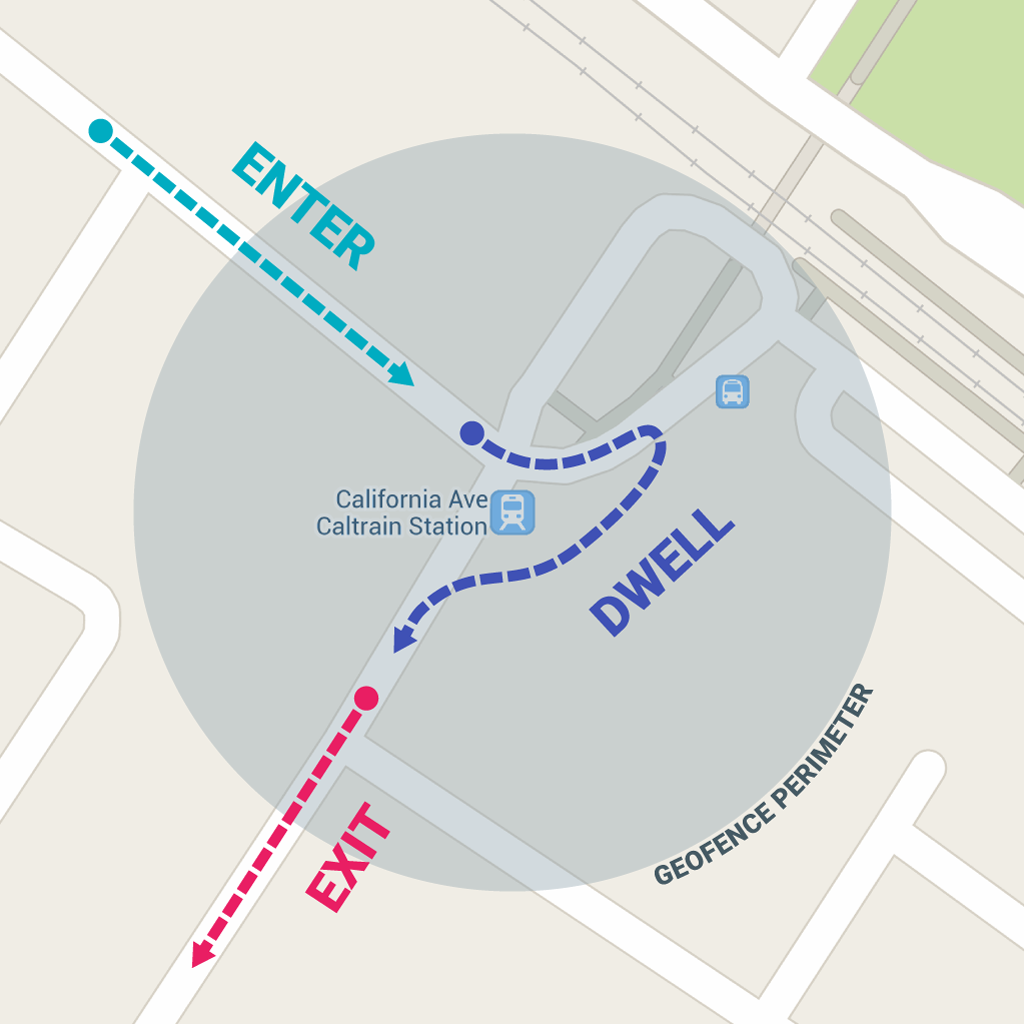
As you can probably tell by now, a huge part of our application is to “know” whenever we are entering into any of the locations that we picked when we first started using the application. This magical functionality can be achieved through what we call “Geofencing.
Geofencing is a service/feature in an application that uses the global positioning system (GPS) or radio frequency identification (RFID) to define geographical boundaries; it allows an administrator/client to set up triggers so when a device enters (or exits) the boundaries defined by the administrator, an alert is issued.
Sounds kinda complicated to implement, doesn’t it? Thankfully, recently the Android platform has released a brand new Geofencing API that supports the creation and monitoring of geofences on a mobile application. For each geofence, you can ask Location Services to send you entrance and exit events, or you can specify a duration within the geofence area to wait, or dwell, before triggering an event. You can limit the duration of any geofence by specifying an expiration duration in milliseconds. After the geofence expires, Location Services automatically removes it.
Below is the link that leads to the specific user guide for using the Geofencing API.
By the end of this part, you should have:
- Created a class that handles the geofencing of all the given locations in the appropriate format (depending on your choice of implementation, it can be a unique ID, the place’s name, the place’s address, or the longitude-lattitude pair)
Part C. Search For Places
Now, there really isn’t anything to set up and monitor geofences on if we don’t know where we are setting up these fences, right? To have the creation and monitoring of geofences work properly, we need to give the user a chance to search for the places they want to create the geofences around!
In order to do this, here are 2 available options for you to take:
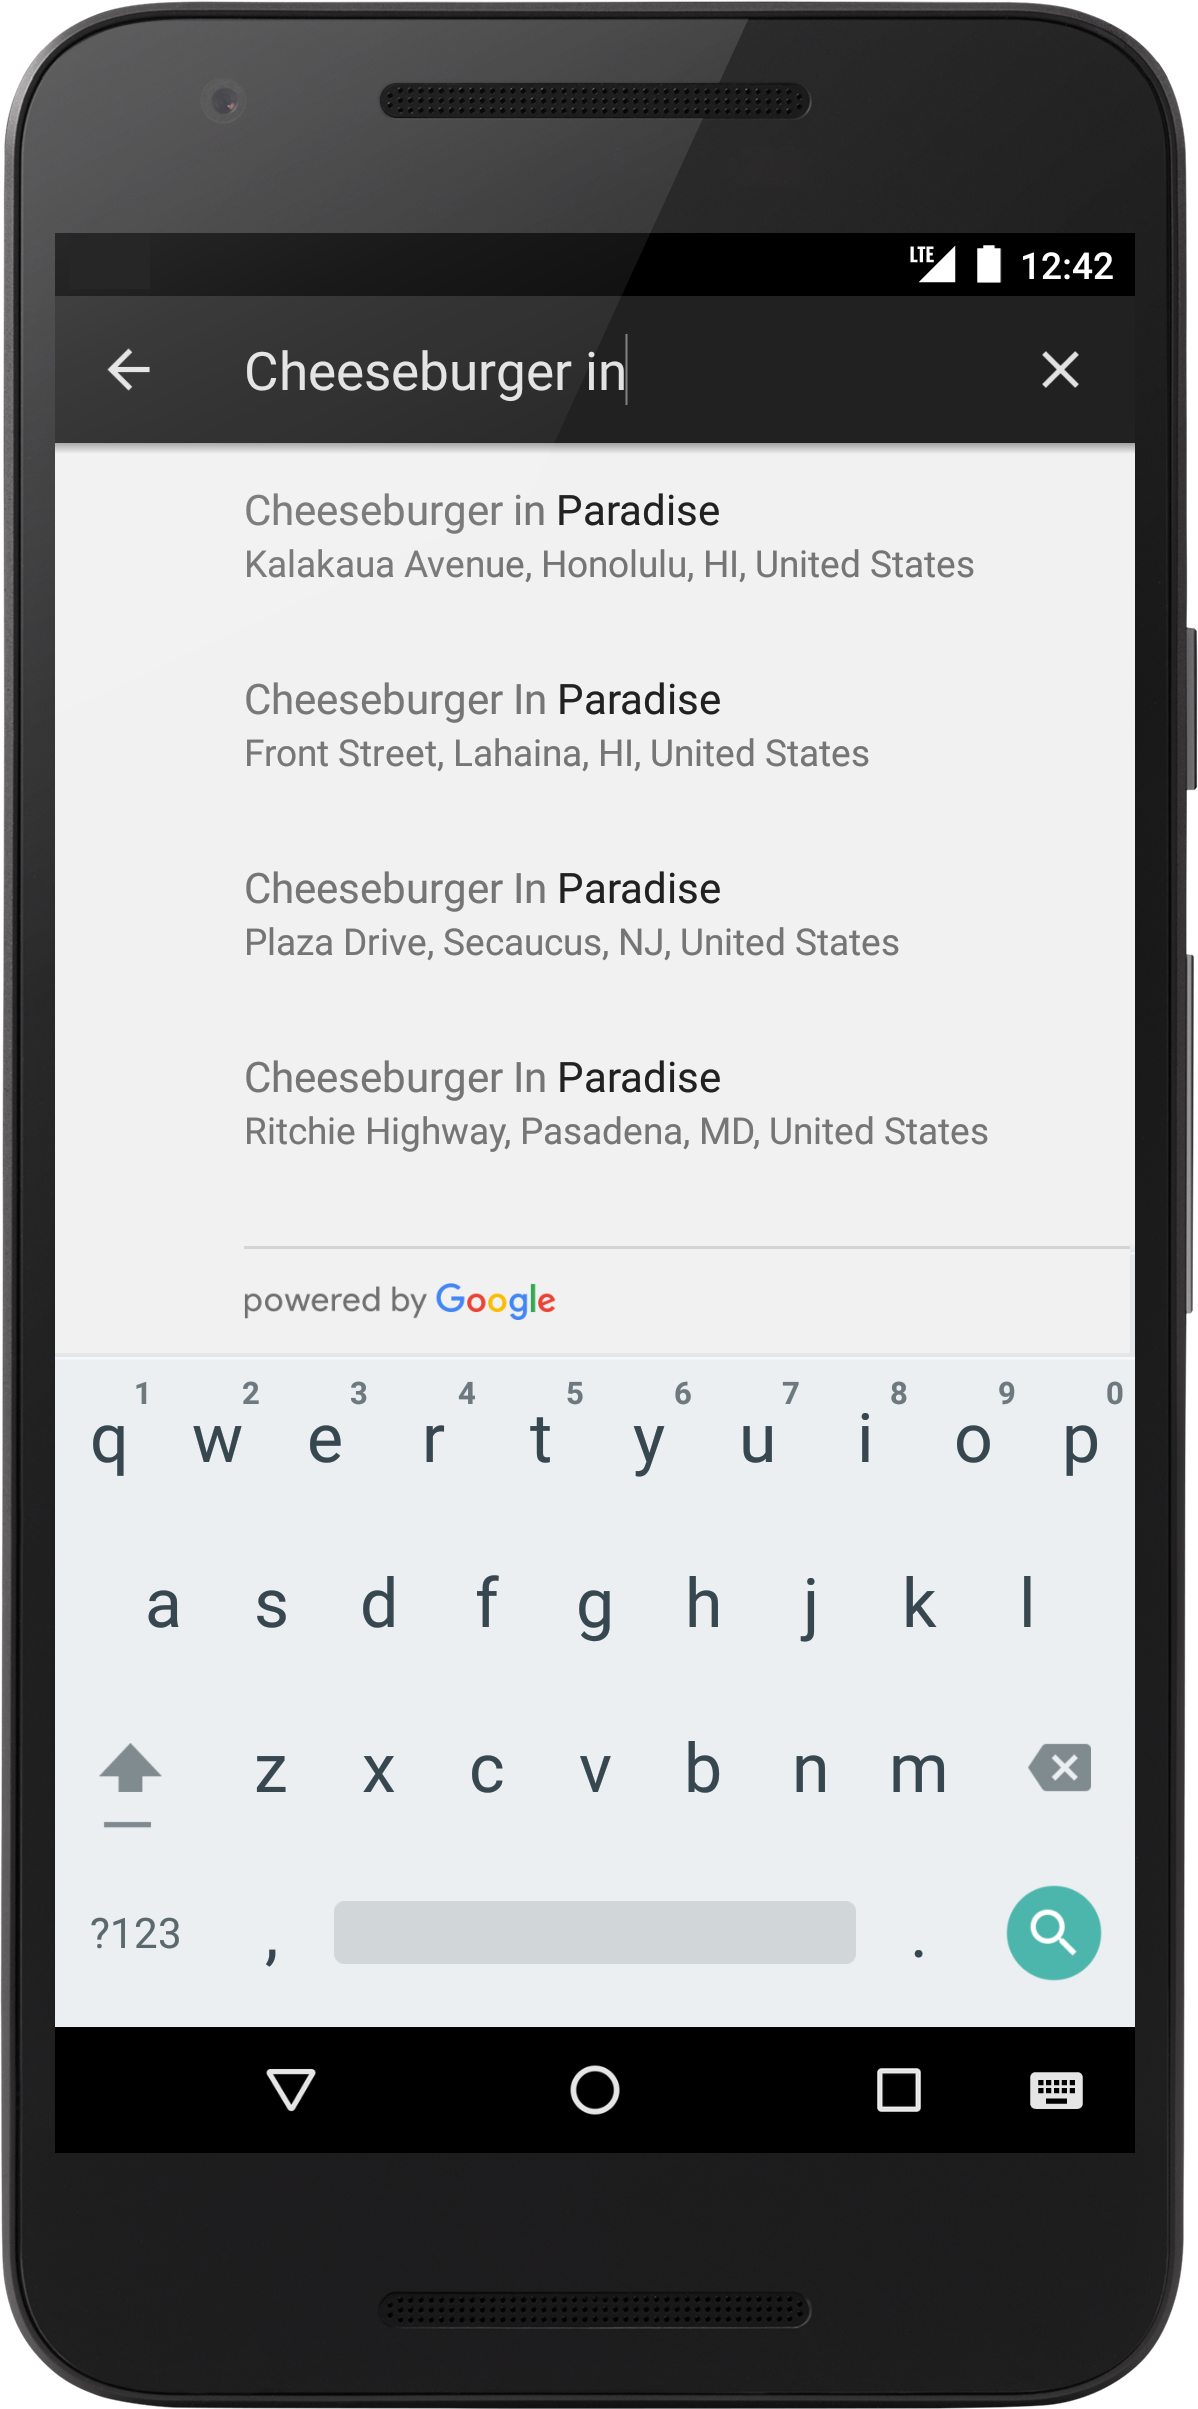
- Use the Google
PlacesAPI that provides functionality for Place Search and GeoCoding (Geocoding takes in a string representing and location name/address and attempts to return the corresponding lattitude and longitude pair, which might be useful for the previous part).- To do this, please reference the link on Google Place Search API calls.
- Utilize the Google Native Android SDK for Places, specifically the
Place Autocomplete Widges. The autocomplete widget is a search dialog with built-in autocomplete functionality. As a user enters search terms, the widget presents a list of predicted places to choose from. When the user makes a selection, a Place instance is returned, which your app can then use to get details about the selected place.
Here are the links for the 2 approaches respectively:
Part D. Combining Them All Together and How to Not Lose Your Data
Congratulations! You’ve made through the key parts of this application, here are some of the stuff that we need to do to wrap up the application and make it more standard and production-ready!
- Once we are done selecting all the locations to set up the geofences, we should transition into a screen that shows a map with marker representing your current location. This should be implemented through the use of the
Fragmentclass (for splitting screen). Here’s the link to the correspondingMapsSDK for Android: Adding a Map with a Marker (in Android) - Again, back to what we’ve learned about data persistence. Once we quit the application, we clear the stack and get rid of all our previous test cases, including all the places we want to set the “Quit Hours” policy on. Consider what you can utilize (from MP4) that is suitable for this situation.
Congratulations! You’ve finished Mini Project 4!
Project Milestone (Tuesday at 3pm) CheckList
By the time you submit the project for the checkpoint, you application should satisfy:
- All specifications/requirements in part A
- All specifications/requirements in part B or part C (based on your order of implementation)
Project Scoring Breakdown
Here is the basic scoring breakdown of the mini-project by parts:
| Parts | Percentages |
|---|---|
| A | ~15% |
| B | ~35% |
| C | ~30% |
| D | ~20% |
Submission
Submission Form will be released soon! Stay Tuned.